“The Ultimate Guide to Perfect Frog Drawing: Proven Tips, Techniques, and Step-by-Step Instructions for 2024”
Frog Drawing animals is an exciting way to practice your sketching skills, and frogs, with their distinctive features and playful personalities, make for a great subject. Whether you’re an experienced artist or just starting, learning how to draw a frog can help you understand shapes, forms, and details better. This guide will take you through everything you need to know about frog drawing, from basic shapes to capturing the nuances of texture and realism. Let’s dive into the world of frog drawings and explore the steps to make your illustrations jump off the page!
Introduction to Frog Drawing
Frog drawing is a fun and creative way to practice capturing the essence of a living creature on paper. With their unique body shape, webbed feet, and big eyes, frogs offer an interesting challenge for artists at all skill levels.
When you start a frog drawing, it’s essential to observe the frog’s anatomy. The head, body, legs, and texture of their skin are all important aspects to focus on. The key is to break the drawing process into manageable steps and gradually build up your sketch by refining these individual elements.
Frog drawing can also serve as an exercise in texture. Frogs often have smooth, slightly bumpy skin with varying color tones, which you can capture using different pencil techniques like shading, cross-hatching, and stippling. By the end of this guide, you’ll have a better understanding of how to approach frog drawings and how to refine them into more realistic illustrations.
- The Importance of Reference in Frog Drawing
A good reference image is crucial for accurately drawing a frog. Studying photos of frogs in different poses helps you understand their proportions, anatomy, and the natural details you might overlook otherwise.
When you’re drawing a frog, it’s not just about replicating an image—it’s about capturing the essence of the creature. References can provide insight into how frogs move, how light interacts with their moist skin, and the structure of their legs and feet, which are different from many other animals.
Don’t limit yourself to just one reference image, though. Collect a variety of frog images, from tree frogs to bullfrogs, and look at how different species vary in their appearance. Doing this will give you a better understanding of the flexibility you have when drawing frogs and help you experiment with different poses and perspectives.
Choosing the Right Materials for Frog Drawing

The materials you choose can make or break your frog drawing. While you can draw with almost any medium, some tools are particularly suited for capturing the texture and detail of a frog’s skin.
Start with basic pencils—ranging from H for light sketching to B for darker shading—if you’re aiming for a realistic frog drawing. For artists interested in adding color, colored pencils, watercolors, or pastels can bring out the vibrant hues found in frogs.
For detailed line work, fine-liner pens are a great addition to your tool kit. They allow you to define the outlines of your frog drawing and add small, intricate details like the tiny bumps on a frog’s skin. Whatever medium you choose, always begin with a light sketch and build up your drawing gradually.
- Breaking Down the Frog’s Anatomy
Understanding frog anatomy is vital for an accurate frog drawing. Frogs have a unique skeletal and muscular structure that affects their posture and movement, making their anatomy worth studying.
Head and Body
Frogs have relatively large heads in proportion to their bodies. Their wide mouths and big, bulging eyes are key features. The body is typically short and squat, with the front legs supporting the head and the powerful back legs tucked under or extended.
Limbs and Feet
The front legs are shorter and less muscular compared to the strong, elongated back legs. Frogs’ webbed feet make for a unique feature to draw. Each species has different degrees of webbing, but the basic structure remains the same. Pay close attention to how the toes taper and how the webbing connects them.
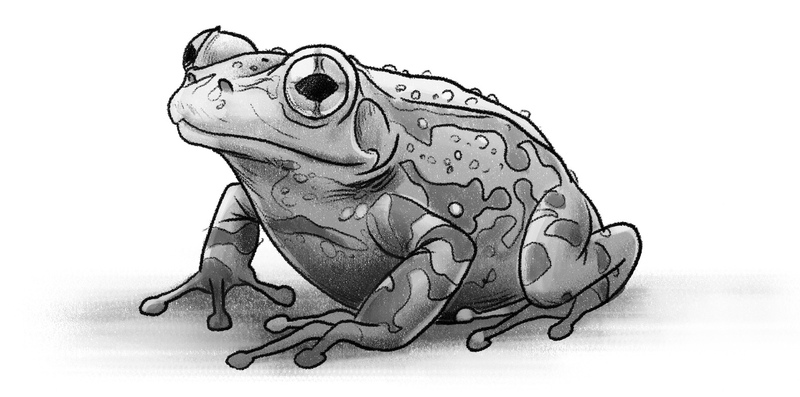
Texture and Skin
Frog skin is usually smooth, but some species may have warts or bumps. Incorporating these textures into your frog drawing helps add realism. You can practice capturing these textures using shading and line techniques, as mentioned earlier.
- Starting with Basic Shapes: Building the Frog’s Form
When starting your frog drawing, break the frog’s body down into basic shapes like circles, ovals, and rectangles. This helps you map out the proportions and placement of the body parts before diving into the details.
Start with an oval for the body and a circle for the head. From there, sketch lines to indicate where the limbs will be. For the legs, use long ovals or rectangles for the thighs and calves, and draw rough triangles or oval shapes for the feet.
Using basic shapes is a tried-and-true method in art because it allows you to create a well-structured and proportionate drawing without getting bogged down by details too soon. Once you’re happy with your basic structure, you can begin refining your frog drawing, adding in details like the eyes, webbing, and skin texture.
Drawing the Frog’s Eyes and Expression
Frog eyes are often the focal point of a frog drawing because they’re such a prominent feature. Frogs have large, expressive eyes that can bring personality and life to your drawing.
Begin by drawing two large, round shapes where the eyes will go. Make sure the eyes are symmetrical and positioned correctly on the head. From there, add in the details like the pupils and eyelids. Frogs typically have horizontal pupils, which give them their unique, alert look.
To make the eyes more realistic, pay attention to the light source in your drawing. Add highlights to the eyes to give them a glossy, wet appearance. This step will make your frog drawing look more lifelike and add depth to your sketch.
- Mastering Frog Legs and Feet
Frog legs, especially the hind legs, are muscular and powerful, making them one of the most defining characteristics of a frog’s body. In your frog drawing, you’ll want to emphasize the strength and flexibility of the back legs.
Start by sketching the basic shape of the legs using elongated ovals for the thighs and calves. Next, draw the knees bent at an angle. Frogs often sit in a crouched position, so the back legs will be tucked close to the body.
The feet are webbed, which is something you can exaggerate for a more stylized frog drawing, or you can keep it more subtle for realism. Either way, the webbing between the toes is a signature feature that should be included. Draw the toes long and slightly tapered, with the webbing connecting them in smooth arcs.
- Shading and Texturing Your Frog Drawing
Shading and texture are what turn a simple outline into a more dynamic and realistic frog drawing. Frogs have moist, sometimes slightly bumpy skin, and capturing this texture with shading can make your drawing more lifelike.
Shading Techniques
Use hatching, cross-hatching, or stippling to add shading. Start by identifying your light source and shading the parts of the frog that are in shadow. The underside of the frog, the areas under the legs, and the far side of the body will typically be shaded.
Texturing Techniques
For the skin, use short, light strokes to add subtle texture, especially if you’re drawing a frog with a bumpy or spotted appearance. Frogs often have varying textures on different parts of their bodies, so pay attention to your reference images to capture these differences. You can also use an eraser to lift highlights and create the illusion of moisture on the frog’s skin.
- Adding Color to Your Frog Drawing
Color can take your frog drawing to the next level. Frogs come in a wide range of colors, from bright greens and yellows to deep browns and reds. Adding color to your frog drawing will help make it more eye-catching and realistic.
If you’re using colored pencils, start by lightly layering the colors. Frogs often have a gradient of colors on their skin, so build up the color gradually, blending as you go. Watercolors are another great option because they allow you to create soft transitions between different colors, which is perfect for frogs’ often iridescent or multi-toned skin.
Don’t be afraid to experiment with bold colors, especially if you’re drawing exotic species like poison dart frogs, which are known for their bright, striking colors. You can also experiment with patterns, adding stripes, spots, or other natural markings to your frog drawing.
- Capturing Frog Movement in Your Drawing
Frogs are known for their leaping ability, and capturing motion in your frog drawing can add a dynamic element to your work. Drawing a frog in motion requires careful observation of how the body moves.
Frogs in Mid-Leap
To draw a frog mid-jump, focus on the extension of the back legs. The legs should be fully stretched out, with the toes splayed, as this adds a sense of energy and propulsion to the drawing. The front legs will be tucked closer to the body.
Frogs in Resting Position
If you’re drawing a frog at rest, the back legs will be bent, with the knees close to the body, while the front legs support the frog’s weight. Adding subtle details like the slight tension in the muscles can make the frog appear poised to jump, even when it’s sitting still.
- Drawing Different Frog Species
There are thousands of frog species, each with its unique characteristics. Experimenting with different species can be a great way to challenge yourself and diversify your frog drawing skills.
Tree Frogs
Tree frogs are small, lightweight frogs with long toes and sticky pads for climbing. In a tree frog drawing, emphasize the elongated fingers and toes and draw the frog in a climbing or perching position.
Bullfrogs
Bullfrogs are larger and bulkier compared to tree frogs. When drawing a bullfrog, focus on the more muscular body and the larger mouth. Bullfrogs have a much more robust appearance, so you can add more mass and volume to the limbs and body.
Poison Dart Frogs
Poison dart frogs are known for their bright colors and tiny size. Their skin often has intricate patterns, so when drawing a poison dart frog, pay close attention to the markings. You can use bright colors and bold contrasts to make these frogs stand out in your drawing.
- Using Different Angles and Perspectives
Changing the angle from which you draw a frog can make your frog drawing more interesting. Instead of always drawing the frog from a side view, try experimenting with different perspectives.
Top View
A top-down view of a frog can show off its back and webbed feet. From this angle, you’ll focus on the symmetrical placement of the limbs and the frog’s wide body shape.
Front View
A front view of a frog allows you to capture the big, round eyes and the front legs in detail. This perspective can make the frog look more expressive, as the eyes will be prominent and the body slightly foreshortened.
3/4 View
The 3/4 view is a combination of the front and side views and is a great way to capture more depth in your frog drawing. This angle allows you to show both the length of the body and the width of the frog’s posture, adding complexity to your drawing.
- Common Mistakes in Frog Drawing and How to Avoid Them
Like any form of art, frog drawing comes with its challenges. Understanding common mistakes and how to avoid them can help you improve your skills.
Proportion Errors
One of the most common mistakes in frog drawing is getting the proportions wrong, especially when it comes to the size of the head compared to the body. Always start with basic shapes and guidelines to avoid disproportionate features.
Flat Limbs
Another mistake is drawing the legs and feet too flat. Frog legs have a lot of muscle definition, and the feet are webbed but still structured. Focus on adding curves and volume to the legs to make them look more realistic.
Ignoring Texture
Frog skin has a distinct texture that can easily be overlooked. Even if you’re aiming for a simple sketch, try to incorporate some texture by using light shading and linework.
- Tips for Beginners: How to Improve Your Frog Drawing Skills
If you’re new to frog drawing or drawing in general, here are some tips to help you improve:
- Practice with Simple Sketches: Start by drawing simple, rough sketches of frogs to get the hang of their proportions and structure. As you become more comfortable, you can add more details and texture.
- Study Frog Anatomy: Understanding the basic anatomy of frogs will help you draw them more accurately. Look at diagrams or photos that show the skeletal and muscular structure of frogs.
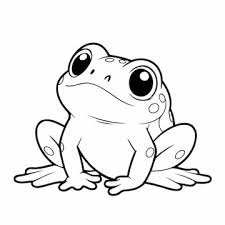
- Experiment with Different Styles: Don’t feel pressured to stick to realism. Frog drawings can be playful and stylized. Try drawing cartoon frogs, exaggerated frog characters, or simplified frog forms.
- Advanced Techniques for Frog Drawing: Realism and Beyond
Once you’ve mastered the basics, you can begin exploring advanced techniques to elevate your frog drawings.
Hyper-Realistic Frog Drawing
Those who enjoy photorealism, focus on refining every small detail, from the fine texture of the skin to the reflections in the eyes. Hyper-realism takes time and patience, but it results in stunningly lifelike drawings.
Mixed Media Techniques
Try combining different materials, such as using watercolor for the base and colored pencils for fine details. This will give your frog drawing more depth and variety in texture.
Abstract Frog Drawing
On the opposite end of the spectrum, abstract frog drawings allow you to play with shapes, colors, and lines in unconventional ways. You can exaggerate the frog’s form, using bold colors and patterns to create an expressive piece of art.
FAQs About Frog Drawing
- How do I start drawing a frog if I’m a complete beginner?
Begin with basic shapes like ovals and circles to map out the frog’s body. Focus on proportions and gradually add more details. Don’t rush into shading or coloring until you’ve got the basic structure down.
- What tools do I need for frog drawing?
At a minimum, you’ll need a pencil and eraser for sketching. For more detailed or colored frog drawings, try using colored pencils, fine-liner pens, or watercolors.
- How can I make my frog drawing more realistic?
To make your frog drawing more realistic, pay attention to texture, shading, and the light source. Study reference photos to understand how light interacts with a frog’s moist skin and how its anatomy is structured.
- What are common mistakes when drawing frogs?
Common mistakes include incorrect proportions (like making the head too big or the legs too small), flat-looking limbs, and ignoring texture. Starting with simple shapes and studying frog anatomy can help avoid these errors.
- How can I add color to my frog drawing?
Use colored pencils, watercolors, or pastels to add color. Frogs come in a wide variety of colors, so feel free to be bold. Start with light layers and build up the color gradually for a more natural look.
- Can I draw frogs in different styles?
Absolutely! Frog drawing can range from realistic to cartoonish. Don’t be afraid to experiment with different styles, perspectives, and poses to develop your unique artistic voice.